
When a dryer stops responding to the controls, most people immediately think the motor is gone or the door switch has failed. In reality, one of the most common reasons a dryer won’t start is a faulty control board.
This job came from a customer in Houston who noticed that the dryer’s display would flicker occasionally and then stop turning on altogether.
Why a Dryer Won’t Start — the Usual Suspects
A dryer that refuses to start usually comes down to one of six things. The useful part is that each one fails in its own way, so the symptom already narrows it down before anyone opens the machine.
- No power at all. Dead display, no lights, nothing. Electric dryers run on 240V — two hot legs — and losing one can leave the machine either completely dead or tumbling with no heat. Breaker and outlet first, always.
- Door switch. The dryer has power, you press start, nothing happens. Listen for the click when you shut the door. No click usually means the switch is worn and the machine still thinks the door is open.
- Thermal fuse. Everything seems fine, but the dryer won’t run. This one is a safety device that blows once and stays blown — and it rarely blows for no reason. Most of the time there’s a clogged vent behind it. Swap the fuse without clearing the duct and you’ll be replacing it again in a month.
- Start switch. The button feels mushy, or it only works if you hold it a certain way.
- Control board. Display flickers, freezes, or the buttons work one day and not the next. Nothing looks burnt when you open it up. That’s exactly the case below.
- Motor or start capacitor. You hear a hum but the drum never moves. The motor is trying to start and can’t get going.
Two of these you can check without tools: the breaker and outlet, and whether the door is latching properly. Cleaning the vent line is worth doing once or twice a year anyway — it prevents the thermal fuse problem and cuts drying times.
Past that, testing a dryer means probing a live 240V circuit. If the basics check out and it still won’t start, that’s where it stops being a DIY job.
Below is a walkthrough of how the repair actually went — step by step.
Initial Complaint & Early Checks
The customer explained that the dryer had been malfunctioning for a few days: sometimes the buttons didn’t respond, sometimes the display froze, and on the last attempt, the unit wouldn’t start at all.
We began with the basics — checking the outlet, breaker, and door switch. Everything looked normal. That usually leaves one direction: the main control board.
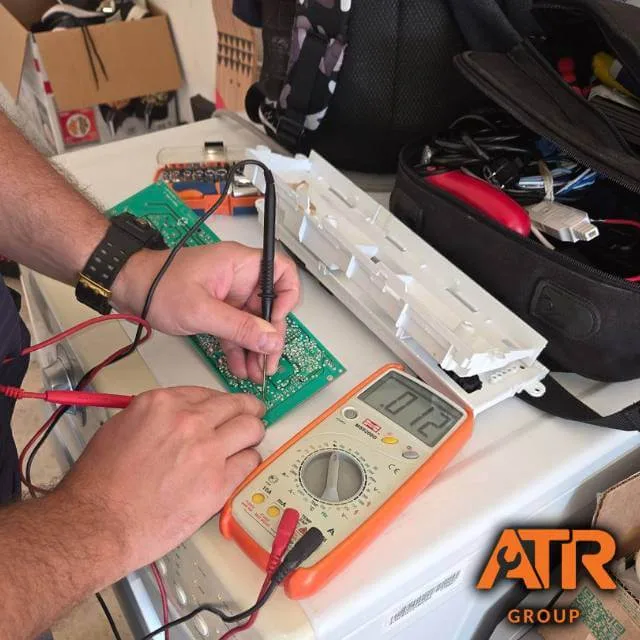
To confirm, we opened the top and tested voltage paths directly on the board. Several readings were inconsistent, which is a strong sign of damage or failing components.
Disassembly & Internal Inspection

After removing the top panel and front assembly, we accessed the wiring harness and internal components. The harness was intact — no burns, no loose connectors.
When the electronics fail without visible physical damage, the issue is usually somewhere deeper on the board.
Removing the Control Panel

The control panel comes off in one piece, and behind it sits the board responsible for nearly all logic inside the dryer — signals from the buttons, relays, safety checks, and cycle start.
Once removed, we could inspect both sides of the board under good lighting.
Bench Testing & Component Repair

On the bench, it became clear that a few components on the board had failed: one resistor was out of tolerance, and a section of the board showed minor heat damage.
Instead of replacing the entire assembly (which can cost over $200–$350 depending on the model), we repaired the damaged portion:
- cleaned oxidized contacts
- reflowed weak solder joints
- replaced the faulty electronic components
Once everything was tested, we reassembled the panel and reinstalled it in the dryer.
Reassembly & Final Test

After putting everything back together, we ran a complete diagnostic cycle. The dryer powered on immediately, the buttons responded as expected, and the machine completed a test cycle without issues.
The total cost for the customer was far lower than replacing the entire control assembly, and they avoided purchasing a new dryer.
Takeaway
Control board failures are becoming more common as appliances rely heavily on electronics. The good news is that a board doesn’t always need to be replaced — many can be repaired the same day, saving customers both money and time.
If your dryer suddenly stops responding, shows a blank display, or refuses to start, ATR Group can take a look and tell you exactly what’s going on.
Dryer not starting? We diagnose and repair dryer control boards across Houston — often the same day. See our dryer repair service, or call +1-832-356-3752 and describe what the machine is doing.


